
Welcome to the Unirac NXT Installation Manual, your comprehensive guide for installing solar mounting systems. This manual provides detailed instructions for the NXT system, ensuring safe, efficient, and code-compliant installations. Designed for solar installers, it covers essential steps, safety protocols, and best practices to ensure a successful setup.
1.1 Overview of the Unirac NXT System
The Unirac NXT system is a cutting-edge solar mounting solution designed for durability and efficiency. It offers a modular design, allowing for flexible installations on various roof types. The system is engineered to withstand harsh weather conditions while ensuring optimal solar panel performance. With its innovative rail structure and secure mounting hardware, the NXT system simplifies the installation process. It is built to meet local building codes and safety standards, ensuring a reliable and long-lasting solar mounting solution. This manual provides detailed guidance for installers to maximize the system’s potential and ensure a seamless setup process.
1.2 Purpose of the Installation Manual
The Unirac NXT Installation Manual serves as a comprehensive guide for installers, providing detailed instructions for the proper installation of the NXT system. Its purpose is to ensure that solar mounting systems are installed safely, efficiently, and in compliance with local building codes and regulations. The manual covers essential steps, from pre-installation requirements to final inspections, and includes safety guidelines and troubleshooting tips. It is designed to help installers achieve a successful and code-compliant installation, maximizing system performance and longevity. By following this manual, users can ensure a seamless and professional setup of the Unirac NXT system.
1.3 Key Features of the Unirac NXT
The Unirac NXT system is designed with innovative features to enhance solar panel installation efficiency and durability. It includes a modular design for flexibility, pre-assembled components to reduce installation time, and adjustable rail structures to accommodate various roof types and angles. The system also features a robust thermal break technology to prevent heat transfer and ensure longevity. Additionally, the NXT system offers compatibility with a wide range of solar panels and integrates seamlessly with Unirac’s U-Builder design tool for precise layout planning. These features make the Unirac NXT a reliable and versatile choice for solar installations, ensuring both performance and compliance with safety standards.
System Components
The Unirac NXT system includes essential components like rails, clamps, and mounting hardware, designed to support solar panels securely and efficiently. These components ensure a sturdy and reliable installation framework.
2.1 List of Components Included in the Unirac NXT
The Unirac NXT system includes a variety of components essential for solar panel mounting. These components are:
- Rails: The structural backbone for mounting solar panels.
- Clamps: Securely attach solar panels to the rails.
- Bolts and washers: Used for assembling and securing components.
- Spacers: Ensure proper alignment and spacing between panels.
- Roof attachments: For securing the system to the roof structure.
- Grounding components: Ensure electrical safety and compliance.
- Sealants and hardware: Prevent leaks and ensure a watertight installation.
These components work together to provide a secure, efficient, and code-compliant solar panel mounting solution.
2.2 Description of Each Component
The Unirac NXT components are designed for durability and ease of installation. The rails are sturdy, anodized aluminum profiles that serve as the mounting base for solar panels. Clamps are available in various types, including top and side clamps, to accommodate different panel configurations. Bolts and washers are high-strength, corrosion-resistant fasteners used to secure components together. Spacers ensure proper alignment and airflow between panels. Roof attachments are engineered for secure mounting on various roof types, ensuring structural integrity. Grounding components provide electrical continuity for safety. All components are designed to withstand harsh weather conditions and ensure a reliable, long-lasting solar installation.
2.3 Compatibility with Other Unirac Products
The Unirac NXT system is designed for seamless integration with other Unirac products, ensuring a cohesive and efficient installation process. It is compatible with Unirac’s U-Builder design tool, which streamlines project planning and layout. The system also works with Unirac’s roof attachment solutions, such as the Stronghold and Thermal Break products, offering flexibility for various roof types. Additionally, the NXT system integrates with Unirac’s electrical bonding and grounding components, ensuring compliance with safety standards. This compatibility ensures installers can leverage a comprehensive suite of tools and products to complete installations efficiently and effectively, while maintaining system performance and reliability.
Pre-Installation Requirements
Before starting, assess the site for structural integrity, environmental factors, and local regulations. Gather all necessary tools, materials, and safety equipment as specified in the manual.
3.1 Site Assessment and Preparation
Begin by assessing the installation site for structural integrity, environmental conditions, and potential obstructions. Ensure the roof is structurally sound to support the solar panel system. Verify the site’s compatibility with the Unirac NXT system, considering factors like roof type, pitch, and local weather patterns. Clear the area of debris and obstructions to ensure safe working conditions. Check local building codes and regulations to ensure compliance. Use the Unirac U-Builder design tool to create an accurate layout and plan. Gather all necessary tools, materials, and safety equipment before proceeding. Proper preparation ensures a smooth and efficient installation process.
3.2 Tools and Materials Needed
To successfully install the Unirac NXT system, gather the necessary tools and materials. Essential tools include a drill, impact wrench, socket set, torque wrench, and measuring tape. Materials required are the NXT components, roof-specific flashing, sealants, lag bolts, and fasteners. Ensure all components are compatible with the roof type and system design. Refer to the Unirac NXT Installation Manual for specific hardware requirements. Organize tools and materials beforehand to streamline the installation process. Always use high-quality, durable materials to ensure system longevity and performance. Proper preparation of tools and materials is crucial for a safe and efficient installation.
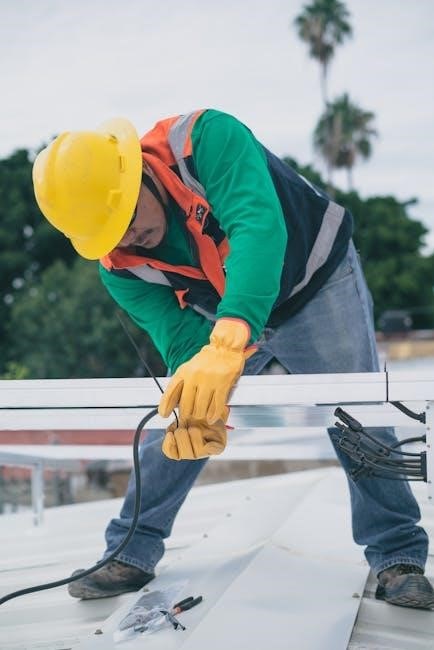
3.3 Safety Precautions
Ensure a safe installation process by following essential safety precautions. Always wear Personal Protective Equipment (PPE), including hard hats, safety glasses, gloves, and steel-toe boots. Use fall protection equipment when working at heights, and ensure ladders are secure and properly angled. Never work on a wet or unstable roof surface. Disconnect power sources before handling electrical components. Use voltage testers to confirm power is off. Avoid overreaching or lifting heavy materials without assistance. Secure loose clothing or jewelry that could get caught in tools. Follow OSHA guidelines and manufacturer instructions for tool usage. Keep the work area clean and free of debris to prevent tripping hazards. Safety is paramount to protect both personnel and the system integrity.
Installation Steps
This section outlines the step-by-step process for installing the Unirac NXT system, from unpacking components to securing solar panels and connecting electrical elements. Follow these organized instructions carefully to ensure a successful and code-compliant installation.
4.1 Unpacking and Organizing Components
Begin by carefully unpacking all components from their shipping boxes. Inspect each item for damage or defects. Organize components by type, such as rails, mounting hardware, and electrical connectors. Refer to the packing list to ensure all items are accounted for. Separate and label smaller parts like bolts and screws to prevent misplacement. Use the provided diagrams or the U-Builder tool to verify quantities and specifications. Arrange components in a logical order based on the installation sequence. Ensure all tools and materials are within easy reach to streamline the process. This step is crucial for efficiency and minimizing delays during installation.
4.2 Assembling the Rail Structure
Begin by assembling the rail structure according to the project layout generated from the U-Builder tool. Start with the base rails, securing them together using the provided splice kits. Attach rail stops and end clamps at the designated positions. Use an Allen wrench to tighten all bolts firmly. Ensure the rails are aligned properly and level before proceeding. Next, connect any mid-clamps or tilt legs as specified in the design plan. Double-check all connections for tightness and alignment. This step ensures the structural integrity of the system, providing a stable foundation for mounting the solar panels. Proper assembly is critical for safety and performance.
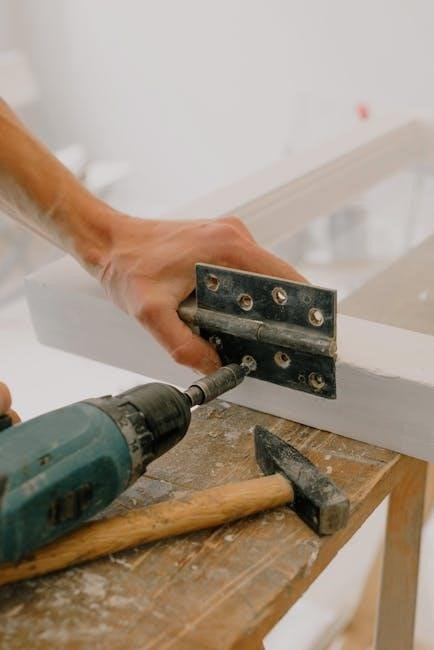
4.3 Mounting the Rails to the Roof
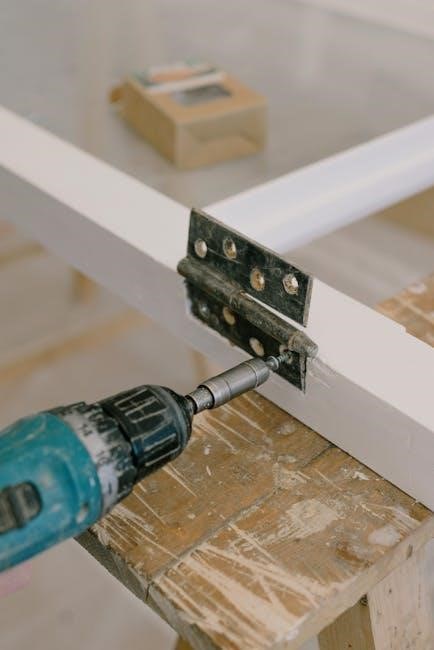
Mounting the rails to the roof begins with locating the rafters using a stud finder. Align the Stronghold attachment with the rafter, ensuring it is centered. Secure the attachment using the provided lag screws, tightening firmly. Apply the butyl sealant around the bolt holes to ensure a watertight seal. Repeat this process for all rail attachments, maintaining the spacing specified in the U-Builder design. Double-check the alignment of the rails with a level and ensure all connections are secure. Properly torque all bolts to the manufacturer’s specifications. This step is critical for ensuring the structural integrity and safety of the solar panel system. Always follow local building codes and manufacturer instructions for roof attachments.
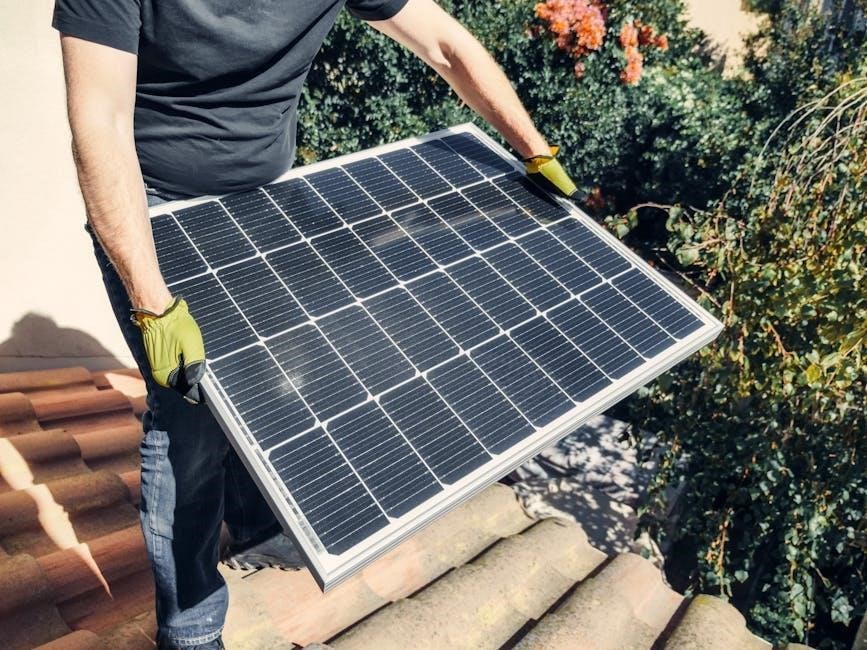
4.4 Securing the Solar Panels to the Rails
After the rails are mounted, position the solar panels carefully onto the rail structure. Align the panel’s mounting holes with the clamps on the rails. Secure the panels using the provided hardware, ensuring a snug fit. Tighten the clamps evenly to avoid damaging the panels or rails. Start from one end and work your way across to maintain alignment. Use a torque wrench to tighten bolts to the manufacturer’s specifications. Double-check that all panels are securely fastened and properly aligned. Ensure no gaps exist between the panels and rails for optimal performance. Finally, verify that the entire array is stable and ready for electrical connections.
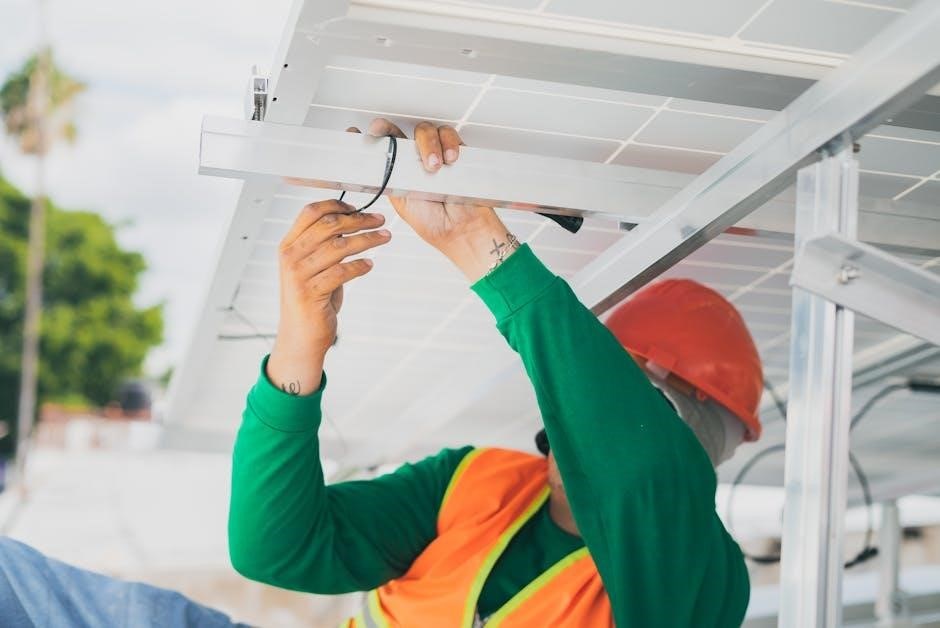
4.5 Connecting Electrical Components
Once the solar panels are securely attached to the rails, proceed to connect the electrical components. Start by connecting the solar panels in series or parallel, depending on the system design. Use the provided connectors or compatible MC4 connectors to ensure a secure and weather-tight connection. Connect the positive terminal of one panel to the negative terminal of the next, following the wiring diagram in the manual. Tighten all connections firmly to avoid loose wires. Ground the system according to local electrical codes and manufacturer instructions. Double-check all connections for tightness and integrity before proceeding. Refer to the Unirac NXT manual for specific torque specifications and wiring guidelines.
4.6 Final Tightening and Inspection
After securing all components, perform a final tightening of all bolts and connections to ensure system stability. Use a torque wrench to apply the specified torque values outlined in the manual. Visually inspect the rail structure, panel attachments, and electrical connections for proper alignment and security. Verify that all fasteners are tightened evenly to prevent undue stress on any single component. Check for any loose or misaligned parts and address them immediately. Ensure all safety measures, such as proper grounding, are in place. Conduct a final walk-through to confirm the system is ready for operation. Adhere strictly to the manufacturer’s guidelines for optimal performance and safety.
Safety Guidelines
Always adhere to safety practices when installing the Unirac NXT system. Wear proper PPE, ensure fall protection measures are in place, and follow electrical safety protocols to prevent accidents.
5.1 Personal Protective Equipment (PPE)
Always wear proper Personal Protective Equipment (PPE) during the installation of the Unirac NXT system to ensure safety. This includes hard hats, safety glasses with side shields, gloves, and steel-toe boots. Additionally, high-visibility vests are recommended to enhance visibility on-site. Ensure all PPE fits correctly and meets industry standards, such as those set by OSHA. Failure to use proper PPE can result in serious injury or legal consequences. Always inspect PPE before use and replace any damaged or worn-out items. Proper use of PPE is critical for protecting yourself and others during the installation process.
5.2 Fall Protection Measures
Fall protection is critical when installing the Unirac NXT system. Always use a properly fitted harness with a lanyard or self-retracting lifeline secured to an anchor point. Ensure anchor points are rated for fall protection and meet local safety standards. Use ladder safety equipment and maintain three points of contact when climbing. Designate a “safe zone” on the roof to minimize fall risks. Regularly inspect all fall protection gear for damage or wear. Never work at heights without proper fall protection equipment. Follow OSHA guidelines and local regulations to ensure a safe working environment. Proper fall protection measures are essential to prevent accidents and ensure a secure installation process.
5.3 Electrical Safety Practices
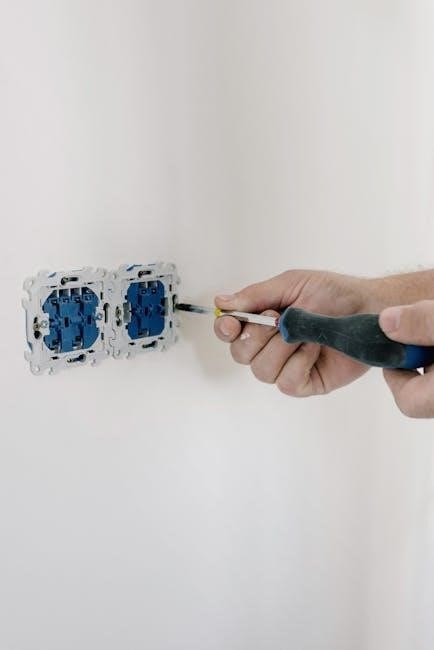
Ensure all electrical components are handled with care to prevent shocks or fires. Always disconnect power sources before starting work and verify voltage is zero using a multimeter. Use insulated tools and wear appropriate PPE when handling electrical connections. Avoid overloading circuits and ensure all wiring complies with local electrical codes. Securely tighten all connections to prevent loose wires, which can cause arcing or overheating. Grounding systems must be properly installed and tested to ensure safety. Never work on electrical systems in wet conditions or near open flames. Keep a fire extinguisher nearby and ensure all team members are trained in electrical safety practices. Adhere to NEC standards and manufacturer guidelines for a safe installation.
Troubleshooting Common Issues
This section addresses common challenges during Unirac NXT installation, such as alignment problems or loose connections, providing solutions to ensure a safe and effective setup.
6.1 Identifying and Resolving Alignment Problems
Alignment issues are common during Unirac NXT installations. Start by ensuring all rails are level and properly secured. Use a bubble level to verify straightness and parallelism. If misalignment occurs, check for uneven surfaces or loose connections. Refer to the U-Builder tool for precise measurements. Gently adjust rails using shims or spacers as needed. Tighten all bolts to the specified torque to prevent shifting. If issues persist, consult the Unirac NXT Installation Manual or contact support; Proper alignment ensures structural integrity and optimal energy production.
- Use a bubble level to verify rail alignment.
- Ensure all bolts are tightened to torque specifications.
- Adjust rails with shims if necessary.
6.2 Addressing Loose Connections
Loose connections in the Unirac NXT system can compromise stability and safety. Begin by inspecting all bolts and screws, ensuring they meet torque specifications outlined in the manual. Use a torque wrench to tighten connections evenly, avoiding warping. Inspect for wear or damage; replace any compromised components. Consider maintenance schedules and compatibility to prevent future issues. Use recommended tools for testing connection security, avoiding over-tightening. Adhere to manufacturer guidelines regarding sealants to maintain electrical integrity. Properly securing connections ensures system reliability and prevents potential electrical hazards.
- Inspect and tighten all bolts to torque specifications.
- Replace any damaged or worn-out components.
- Avoid using sealants that could interfere with electrical components.
Best Practices for Installation
Always follow the manufacturer’s instructions and use the U-Builder tool for precise designs. Ensure compliance with local codes and use compatible components for optimal performance.
- Plan thoroughly using the U-Builder tool.
- Verify all components are compatible.
7.1 Following Manufacturer Instructions
Adhering to the Unirac NXT installation manual is crucial for a safe and efficient installation. The manual provides detailed, product-specific guidance to ensure compliance with safety standards and optimal system performance. Always refer to the U-Builder tool for precise design layouts and component compatibility. Deviating from instructions can lead to system malfunctions or safety hazards. Ensure all installers are trained and familiar with the manual before starting the project. This approach guarantees adherence to local codes and manufacturer warranties, minimizing risks and ensuring a reliable solar mounting system. Properly following instructions also streamlines the installation process, reducing errors and downtime.
7.2 Ensuring Compliance with Local Codes
Compliance with local building codes is essential for a safe and legally compliant solar installation. The Unirac NXT installation manual provides detailed guidance to help installers meet local regulations. Review and understand all applicable codes before starting the project. The manual includes specifications for structural integrity, electrical connections, and fire safety, ensuring adherence to regional standards. Use the U-Builder design tool to generate installation plans that align with local requirements. Proper compliance not only avoids legal issues but also ensures system reliability and safety. Always verify local permits and inspections are completed as required. This step is critical for a successful and code-compliant installation.
Using the Unirac Design and Layout Tool
The Unirac Design and Layout Tool simplifies solar installation planning. Accessible online, it allows users to input project specifications and generate precise installation plans. This tool ensures compatibility with local codes and manufacturer guidelines, streamlining the design process for accurate and efficient system layout.
8.1 Accessing the U-Builder Tool
To access the U-Builder Tool, navigate to http://design.unirac.com/tool/project_info/solarmount_2/. This online platform is designed to assist with solar installation planning. Create an account or log in to access advanced features. The tool is integrated with the Unirac NXT Installation Manual, ensuring compatibility with local codes and manufacturer guidelines. It streamlines the design process, allowing users to input project specifications and generate precise installation plans. For first-time users, tutorials and guides are available to help navigate the tool effectively. Ensure your browser meets the system requirements for optimal performance.
8.2 Inputting Project Specifications
Once logged into the U-Builder Tool, input your project specifications by selecting system size, roof type, and local building codes. Use dropdown menus and data fields to enter precise measurements and requirements. Ensure accuracy to comply with safety standards and regulations. The tool allows you to customize settings for optimal system performance. Review and confirm your inputs before proceeding to generate installation plans. This step ensures compatibility with the Unirac NXT system and local regulations. For assistance, refer to the help icons or user guides provided within the tool. Accurate input guarantees a seamless installation process and adherence to manufacturer guidelines.
8.3 Generating Installation Plans
After inputting project specifications, the U-Builder Tool processes the data to generate detailed installation plans tailored to your project. These plans include system layouts, component quantities, and step-by-step instructions for assembling the Unirac NXT system. The tool ensures compliance with local building codes and manufacturer guidelines. Review the generated plans to verify accuracy and make any necessary adjustments. Once satisfied, download or print the plans for use during installation. This feature streamlines the process, reducing errors and ensuring a professional-grade setup. The plans also include a materials list, facilitating efficient preparation and execution of the installation.
Code-Compliant Installation
Ensuring compliance with local building codes and regulations is crucial for a safe and legal solar installation. The Unirac NXT manual provides guidelines and tools to simplify this process, ensuring adherence to all necessary standards.
9.1 Understanding Local Building Codes
Understanding local building codes is essential for a compliant Unirac NXT installation. These codes vary by region and dictate structural, electrical, and safety requirements. Installers must familiarize themselves with local regulations to ensure the system meets all criteria. The Unirac NXT Installation Manual provides a framework to align with these standards, offering guidelines for permits, inspections, and documentation. Referencing the manual alongside local codes ensures a seamless installation process, avoiding potential legal and safety issues. Compliance with these codes guarantees a safe and durable solar mounting system, meeting both regulatory and performance expectations.
9.2 Ensuring Compliance with Regulations
Ensuring compliance with regulations is critical for a successful Unirac NXT installation. This involves adhering to local building codes, electrical standards, and safety requirements. The Unirac NXT Installation Manual provides detailed guidelines to help installers meet these regulations. Key steps include obtaining necessary permits, conducting pre-installation inspections, and verifying system components meet local standards. Proper documentation and adherence to manufacturer instructions are also essential. Compliance ensures the system is safe, durable, and legally approved, avoiding potential fines or rework. By following the manual and local regulations, installers can guarantee a code-compliant and high-performance solar mounting system.
Maintenance and Inspection
Regular maintenance ensures optimal performance and longevity of the Unirac NXT system. Schedule routine inspections to check for wear, clean components, and verify secure connections. Refer to the manual for detailed maintenance procedures.
10.1 Regular Inspection Schedule
A regular inspection schedule is crucial for maintaining the integrity and performance of the Unirac NXT system. Inspections should be conducted quarterly, or more frequently in harsh weather conditions. Begin with a visual assessment of all components, checking for signs of wear, corrosion, or damage. Ensure all bolts and connections are secure and tighten as needed. Verify that solar panels are properly aligned and mounted. Check electrical connections for integrity and signs of degradation. Document all findings and address any issues promptly. Refer to the manual for specific inspection procedures and guidelines to ensure compliance with manufacturer recommendations. Regular inspections help prevent potential issues and ensure optimal system performance.
10.2 Cleaning and Adjusting Components
Cleaning and adjusting components of the Unirac NXT system is essential for maintaining its efficiency and longevity. Use a soft, non-abrasive cloth and mild detergent to clean solar panels and hardware, avoiding harsh chemicals or abrasive materials. Regularly inspect and clean debris from mounting rails and clamps to ensure proper fit and functionality. Adjust components as needed to maintain alignment and structural integrity. Check bolts and fasteners for proper torque specifications, referencing the installation manual for guidance. Ensure all adjustments are made with approved tools to prevent damage. Cleaning and adjustments should be performed during routine inspections to maintain optimal system performance and safety. Always follow manufacturer guidelines for best results.
The Unirac NXT Installation Manual provides a comprehensive guide for installing solar mounting systems safely and efficiently. By following the outlined steps and guidelines, installers can ensure a successful setup that meets all safety and performance standards. Always refer back to this manual for any additional guidance or clarification needed during or after installation. Proper adherence to the instructions will ensure optimal system functionality and longevity. If issues arise, consult the troubleshooting section or contact Unirac support for assistance. This manual serves as your go-to resource for all NXT-related installation needs. Happy installing!
11.1 Summary of Key Installation Steps
The Unirac NXT Installation Manual outlines a structured process to ensure a seamless setup. Begin by unpacking and organizing components, followed by assembling the rail structure; Mount the rails securely to the roof, ensuring proper alignment. Next, attach the solar panels to the rails using the provided hardware. Connect all electrical components, adhering to safety guidelines. Perform a final inspection and tighten all connections to prevent loosening over time; Always follow manufacturer instructions and consult the manual for specific details. Proper execution of these steps guarantees a safe, efficient, and code-compliant installation. Refer to the manual for troubleshooting common issues that may arise during or after installation.
11.2 Final Checklist for Completion
Ensure all components are securely fastened and aligned properly. Verify that the rail structure is correctly assembled and mounted to the roof. Confirm that solar panels are firmly attached to the rails. Check all electrical connections for tightness and integrity. Inspect the system for any damage or loose parts. Ensure compliance with local building codes and safety standards. Review the Unirac NXT Installation Manual to confirm all steps are completed. Use the U-Builder Tool to validate the system design. Document the installation for future reference and maintenance. This checklist ensures a safe, efficient, and code-compliant solar mounting system installation.